
TL;DR

Get workout gear delivered free with Prime
- Fast, free delivery on millions of items
- Prime Video, Amazon Music and more included
- Member-only deals all year
Tight ankles often restrict squat depth and stability. Using specific mobility drills, strengthening the range, and adjusting technique can improve ankle flexibility and make squatting easier. Lasting progress requires consistency over weeks, not just quick fixes.
Ever feel like your heels lift off the ground as you squat deeper? That’s often a sign of tight ankles — a common hurdle for lifters and fitness enthusiasts alike.
Understanding what limits your ankle movement and knowing how to address it can unlock better squat depth, stability, and confidence. This guide walks you through simple, effective steps to loosen tight ankles and squat with more ease and control.
Perform the knee-to-wall test regularly to monitor ankle mobility and guide your training.
Target calf muscles with both straight-knee and bent-knee stretches for comprehensive flexibility gains.
Strengthen the new range through controlled exercises like calf raises and step-downs to make mobility lasting.
Adjust your squat stance and technique to accommodate ankle limitations without forcing movement.
Use heel wedges temporarily to keep squatting comfortably while working on mobility and strength.
Movement guide / ankle dorsiflexion
How to Fix Tight Ankles That Limit Your Squat
When your heels rise, knees cave, or torso pitches forward, limited ankle motion may be part of the problem. Test the range, mobilize it, strengthen it, and adapt your squat while progress builds.
“Mobility becomes useful when you can control and load the new range.”
Is your ankle actually holding you back?
Ankle mobility is only one part of squat mechanics. Hip mobility, stance, balance, limb proportions, technique, and injury history can also shape your squat.
The knee-to-wall test
Face a wall with the whole foot flat and second toe pointing forward.
Move the knee toward the wall without lifting the heel.
Keep the arch stable and the knee tracking over the middle toes.
Find the farthest controlled distance and compare both sides.
A practical reference
Do not chase a number blindly. The useful target is enough pain-free range for your chosen squat style without major compensation.
“Tight” can mean more than one thing
The sensation may come from muscle stiffness, tendon sensitivity, joint restriction, protective tension, swelling, an old injury, or anatomy that stretching cannot change.
Calf stiffness
Tight or poorly conditioned gastrocnemius and soleus muscles can restrict forward shin travel.
Previous sprain
Old sprains or immobilization can leave one ankle noticeably more restricted than the other.
Achilles tolerance
A stiff or sensitive Achilles may need gradual loading rather than aggressive stretching.
Abrupt blockage
A hard front-of-ankle pinch can suggest a joint or injury-related factor worth assessing.
Foot instability
Arch collapse or poor knee tracking can make usable ankle range look smaller than it is.
Individual anatomy
Bone structure and body proportions can impose limits that mobility drills cannot alter.
The mobility-to-strength protocol
Passive flexibility can create a window. Controlled movement and progressive strength teach your body to keep that window open.
Straight-knee calf stretch
Keep the heel down, foot forward, and knee straight. Move toward the wall without rolling onto the inside edge of the foot.
30–60 sec × 2–3Bent-knee calf stretch
Bend the knee over the middle toes while keeping the heel and base of the big toe grounded. Avoid bouncing.
30–60 sec × 2–3Knee-over-toe mobilization
From a split stance, guide the knee forward slowly while maintaining a stable foot. A resistance band is optional.
8–12 reps / sideLoad the new motion
Use calf raises, tibialis raises, controlled step-downs, split squats, or supported deep squat holds.
Slow + progressiveAdjust the lift while mobility improves
Technique modifications are practical tools, not failures. Use the version that lets you train with stable feet, aligned knees, and tolerable symptoms.
| Strategy | Immediate effect | Best use | Long-term fix? |
|---|---|---|---|
| Slightly wider stance | Reduces forward ankle demand | ✓ Comfortable depth | ~ Technique option |
| Modest toe turnout | Creates room for the knees | ✓ Better tracking | ~ Anatomy dependent |
| Heel wedge or lifting shoe | Reduces dorsiflexion requirement | ✓ Upright squatting now | ✗ Does not remove restriction |
| Supported squat | Improves balance and control | ✓ Range practice | ~ Progress support gradually |
| Forcing extra depth | Increases compensation or pain | ✗ Avoid | ✗ Poor strategy |
Five rules for lasting progress
Warm-ups can create an immediate improvement. Lasting change comes from repeated exposure, gradual loading, good technique, and realistic expectations.
Test regularly
Track knee-to-wall distance and compare sides under the same conditions.
Stretch both calf positions
Use straight- and bent-knee work for broader calf coverage.
Strengthen the range
Make new motion stable with calf raises, step-downs, and split squats.
Adapt your stance
Let foot angle, stance width, and squat style match your current mobility.
Use wedges strategically
Keep training comfortably while mobility and strength catch up.
Know when mobility work is not enough
Stop forcing the range and seek qualified assessment if you have sharp pain, swelling, a hard front-of-ankle pinch, an abrupt block, instability, or a large side-to-side difference—especially after injury.
How to tell if your ankle is holding you back during squats
The easiest way to check if your ankles are limiting your squat is the knee-to-wall test. Stand facing a wall with your foot flat, toes pointing forward. Drive your knee toward the wall without your heel lifting. Measure how far your toes are from the wall. Less than 8–10cm often indicates limited dorsiflexion.
If your ankle feels stiff, or if you notice your heels rising or your torso leaning forward excessively, your ankles might be the culprit. Sometimes, a tight calf muscle is the main issue, and warming up can temporarily loosen things up. But if you feel sharp pain or swelling, it’s best to see a professional.
As an affiliate, we earn on qualifying purchases.
Why your tight ankles are a common squat obstacle
Tight ankles happen for many reasons: stiff calf muscles, previous sprains, immobilization, or even natural bone structure. When ankle mobility is limited, your body compensates — heels pop up, knees cave inward, or you lean forward more than usual.
Imagine trying to bend a stiff door hinge. No matter how much you push, it won’t move freely. The same goes for your ankle joint. Limited dorsiflexion can make a deep, upright squat feel unstable or even painful, especially when trying to go below parallel.
This compensation not only affects your squat depth but can also put extra stress on other joints like your knees and lower back, increasing injury risk. Recognizing this helps you understand why improving ankle mobility is crucial—not just for better squats but for overall joint health and movement efficiency.
calf stretch bands for flexibility
As an affiliate, we earn on qualifying purchases.
As an affiliate, we earn on qualifying purchases.
Simple stretches that loosen your calves and improve ankle flexibility
Stretching your calves is a quick way to boost ankle mobility. Focus on two key stretches:
- Straight-knee calf stretch: Stand facing a wall, heel down, toes pointed forward. Push your hips toward the wall until you feel a stretch in your calf. Hold for 30–60 seconds. Repeat 2–3 times.
- Bent-knee calf stretch: Slightly bend your knee over your toes, keeping your heel grounded. This targets the soleus muscle, which is crucial for deep squats. Hold for the same amount of time.
Consistent stretching helps lengthen tight muscles, but be aware that flexibility gains can plateau if not combined with strengthening. These stretches are most effective when integrated into a regular mobility routine, ensuring your calf muscles don’t tighten back up over time. Remember, flexibility is a foundation, but without strength, the range can remain unstable or prone to re-tightening.
As an affiliate, we earn on qualifying purchases.
Mobilize your ankles with controlled knee-over-toe exercises
Mobility isn’t just about stretching — it’s about moving through the range. Try knee-over-toe mobilizations:
- Start in a half-kneeling or split stance.
- Gradually push your front knee over your toes while keeping your heel flat.
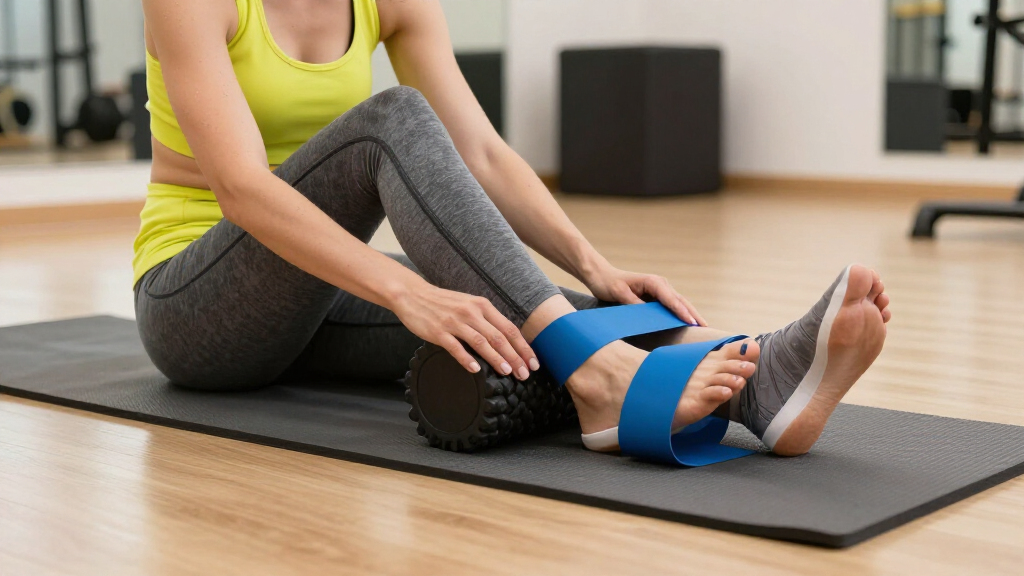
- Use a resistance band around your ankle for resistance if needed, but focus on slow, controlled movement.
- Repeat 8–12 times per side.
This drill helps your ankle learn to tolerate and control dorsiflexion, making deep squats more comfortable. The key is consistency; each repetition trains your ankle to move safely and efficiently within its available range. Over time, this control reduces compensatory movements, improving overall squat stability and reducing strain on other joints. Think of it as teaching your ankle to move smoothly rather than just stretching it passively.
As an affiliate, we earn on qualifying purchases.
Build strength in your new ankle range for lasting change
Stretching alone isn’t enough. You need to strengthen in the range you’re trying to improve. Try exercises like:
- Calf raises on toes and heels
- Tibialis raises (lifting the front of your foot)
- Slow step-downs from a box or step
- Supported deep squats with a wedge under your heels
Gradually increase load and volume. Making your newly gained range strong helps prevent re-tightening and supports better squat form over time. Strengthening in the functional range ensures your muscles and tendons adapt to the new mobility, reducing the risk of regression. This integrated approach promotes long-term improvements, allowing you to squat deeper with control and confidence rather than just temporarily increasing flexibility.
Adjust your squat stance and technique to work with your ankles
If ankle mobility is limited, small tweaks can make a big difference. Try a slightly wider stance or a modest toe turnout. These changes can reduce ankle demand while still allowing deep, safe squats.
Ensure your knees track in the same direction as your toes. If your heels lift or knees cave inward, tweak your stance or bar position. Sometimes, a low bar squat or an elevated heel wedge can help you maintain better alignment without forcing mobility beyond safe limits.
Adjustments like stance width and foot angle aren’t just shortcuts—they can align your body mechanics to your current mobility, reducing compensatory strain and making your squat more efficient. Over time, as your mobility improves, these modifications can be gradually lessened to move toward a more natural stance.
Use heel wedges temporarily to keep squatting comfortably
Heel wedges or small plates under your heels can immediately improve squat depth when ankle mobility is tight. They reduce the dorsiflexion demand, allowing you to maintain upright posture and proper knee tracking.
Choose a stable, nonslip surface for safety. Remember, wedges aren’t a fix for the restriction — they’re a stepping stone while you work on mobility and strength. Using them temporarily allows you to perform squats with proper form, which helps prevent compensations that could cause injury. Over time, as your mobility improves, aim to reduce reliance on wedges, gradually restoring natural ankle movement while maintaining good technique.
Create a simple warm-up to prime your ankles before squatting
Warm-up activates your muscles and prepares your joints. Try this quick routine:
- Knee-to-wall mobilizations: 8–12 reps per side
- Bent-knee calf stretch: 30–45 seconds per side
- Calf raises: 10–15 reps
- Supported deep squat: 20–30 seconds
Follow with a few light warm-up sets of squats. If your ankle feels more mobile afterward, you’re on the right track. An effective warm-up not only prepares your joints but also primes your nervous system to move with better control, reducing the risk of injury and improving squat depth from the outset. Tailoring your warm-up to include mobility and activation drills ensures you get the most benefit from each session.
What to expect and how to keep progressing
Immediate improvements can happen during warm-up, but lasting change takes time. Practice mobility drills 2–5 times weekly. Track your knee-to-wall distance, squat depth, and heel contact. Be patient — consistent work over several weeks yields better results than quick fixes.
Remember that progress isn’t always linear. You might experience plateaus or temporary regressions, but persistence is key. Combining stretching, mobilization, and strength training creates a comprehensive approach that addresses both the flexibility and stability needed for optimal squatting. Over time, you’ll notice increased confidence, better control, and the ability to squat deeper with less effort. Think of it as building a foundation—steady, consistent effort ensures long-term success.
Common pitfalls to avoid when fixing tight ankles
Avoid forcing painful dorsiflexion or relying solely on passive stretching. Over-twisting your foot during tests or ignoring side differences can do more harm than good. Don’t assume one drill fixes everything — ankle mobility is multi-faceted.
Be cautious with aggressive band tension or rushing into deep squats without proper preparation. Progressively load and respect your body’s signals to prevent injury. Pushing beyond your current capacity can lead to setbacks, pain, or injury. Instead, focus on controlled, gradual improvements, listening to your body’s responses. Recognizing that mobility is a process helps prevent frustration and ensures safe, sustainable gains.
When to see a professional for your ankle issues
If you experience persistent pain, swelling, instability, or significant side-to-side differences, consulting a qualified healthcare provider is wise. Sharp pinching, locking, or numbness are signs that require expert assessment.
Professional evaluation can identify structural issues, joint restrictions, or injury-related problems that stretching alone can’t fix. Always prioritize safety and proper diagnosis. Addressing underlying issues early can prevent chronic problems and ensure your mobility work is safe and effective. If mobility exercises don’t produce improvements over several weeks or symptoms worsen, seeking professional advice becomes even more critical.
Frequently Asked Questions
How much ankle mobility do I need to squat comfortably?
There’s no single magic number. It depends on your squat style, depth, stance, and body proportions. Generally, a range that allows your knees to travel over your toes without pain or compensation is enough for most people.
Can stretching alone fix tight ankles?
Stretching helps loosen muscles, but lasting change requires strengthening the range and adjusting your technique. Combining both approaches yields better, more durable results.
Is heel elevation cheating?
Not at all. Heel wedges are a legitimate tool to improve squat form temporarily while you work on mobility. They’re often used in weightlifting and strength training to support proper mechanics.
How often should I work on ankle mobility?
Practicing mobility drills 2–5 times weekly is a good starting point. Consistency is more important than duration—regular effort over weeks builds lasting change.
When should I see a professional about my ankles?
If you experience sharp pain, swelling, instability, or persistent symptoms despite training, consult a healthcare professional for tailored assessment and advice.
Conclusion
Limited ankle mobility isn’t a life sentence for your squat. With targeted stretches, controlled mobilizations, and smart technique tweaks, you can gradually loosen tight ankles and squat with more confidence.
Remember, consistent effort over weeks, not days, is key. Your ankles are just part of your movement story — keep moving forward.
Halloween Picks
halloween
As an affiliate, we earn on qualifying purchases.